SweetAllium
  • Blog
  • About
  • Projects
  • Gallery
  • Connect

Bone Broth

6/10/2015

0 Comments

 
Picture
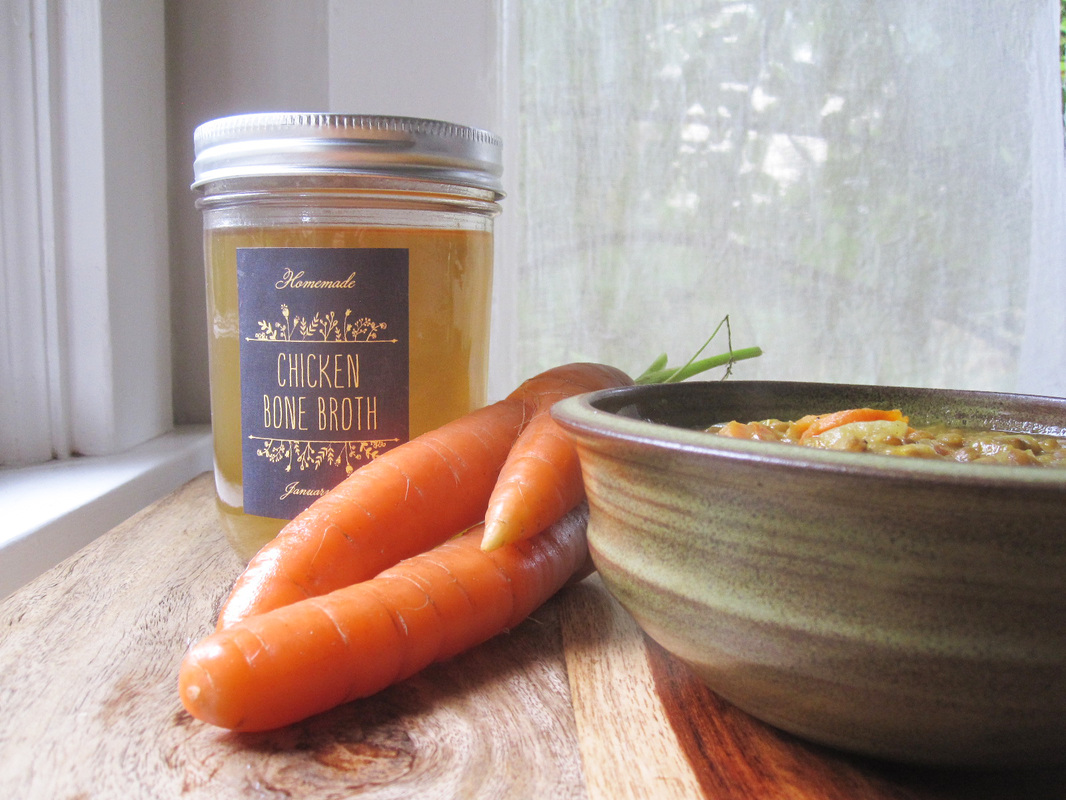
I spent this past Saturday morning at the Hollywood Farmers Market here in Portland, Oregon, doing a cooking demonstration about delicious, nutritious bone broth. See, I’ve been making bone broth (also called stock) for a couple years now, and it wasn’t until I spent a few minutes with a book called Nourishing Broth by Sally Fallon Morrel and Kaayla T. Daniel, that I realized how much more there was to know about bone broth—how it can be used therapeutically for a variety of specific conditions, and how it changes depending on the bones, the species and cooking time. I shared some of my new knowledge at the market, along with an original recipe for dog biscuits that use the long-cooked softened bones as an ingredient.

Here’s a couple basic recipe for bone broth that you can make at home. Stay tuned for Doggy Biscotti!


Bone Broth - Slow Cooker or Stove Top

bones of chicken, lamb or beef
water to cover
about 1/4 cup apple cider vinegar to every half gallon of water


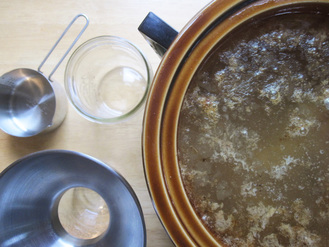
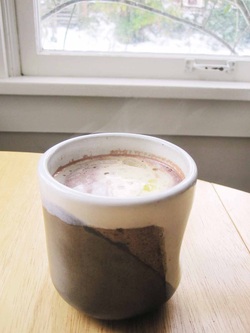
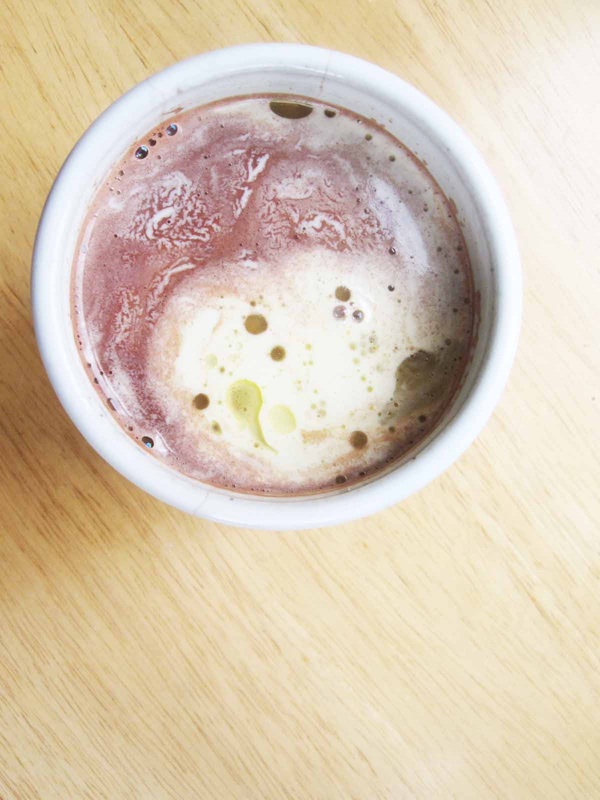
Combine all the ingredients in a large pot, cook over very low heat, avoiding a boil, for 24 hours. Allow the pot to cool slightly, then remove the broth and enjoy it in soups, sauces or as a daily tonic with fresh herbs and a small amount of salt. The particulate matter is nutritious as well as the clear liquid, but if you like a cleaner look, you can strain out the particulates with a coffee filter or a few layers of cheesecloth. Bone broth will keep for about a week in the fridge, or it can be frozen for later use.

Continuous Slow Cooker Bone Broth

To keep a continuous batch of bone broth going, follow the above recipe using a slow cooker and ladle out a quart of broth. Replace the liquid with water and a few tablespoons of apple cider vinegar and allow the broth to cook for another 24 hours before removing additional bone broth.
Over time, the bones will soften as the minerals and proteins are dissolved into the broth. The qualities of the broth will change too, depending on how long the bones are cooked and what part of the animal they are from.

Picture
0 Comments

Wojape: Sweet Berry Soup

1/8/2015

0 Comments

 
PictureMaking Wojape: Sweet Blueberry Soup
Hello there Sweet Allium!

For the past several months I've been pouring my blogging energy into a number of posts for the ever-charming, ever-creative Evermine blog, sharing what I can about yummy food, herbalism and how to package it all up as beautiful gifts and favors. It's been a great experience to work with the staff at Evermine, and I suspect my ongoing blog projects for both Evermine and Sweet Allium will reinforce each other.

For example, through my work on a few Evermine blog posts, as well as a cool NPR piece about a Lakota chef reinventing traditional recipes, an old family recipe resurfaced for me--wojape: a delicious sweet berry soup. Wojape is also a perfect example of food as delicious medicine.

At my dad's house growing up, wojape was what we'd make on special occasions to top our waffles, something like a fruit compote, but the original recipe is much more refined--a stand-alone berry pudding made of food foraged on the great plains. I remember that my grandmother, who had grown up on the Rosebud Indian Reservation in South Dakota, then in my memory, aged, wheelchair-bound, and without an appetite, came to life when my dad placed a bowl of wojape in front of her at the table.

The original recipe for wojape (or wojapi) calls for chokecherries and used timpsila, a root, as a thickener. These days a common recipe for wojape replaces the chokecherries with dark berries or cherries, adds sugar, and uses cornstarch as a thickener.

I've made my family recipe, akin to the common recipe, too many times to count, but I recently reworked the recipe, with, as usual, an effort to remove sugar and processed foods. Also, because my culinary interests are ever-bending toward diets for diabetes and pre-diabetes, and because so many people in my family and so many Native Americans struggle with diabetes, I couldn't help but lend my herbal knowledge in that direction. The result is a blueberry-based wojape (blueberries are a superfood, for everyone, but also for people with diabetes) that is thickened and sweetened with freshly ground cinnamon (cinnamon reduces insulin resistance and helps to lower blood sugar) with optional powdered maca (maca is an Andean root, food and medicine, known for hormone balancing). Personally, I love the flavor of maca, which is sweet and slightly bitter, and I find it balances out the tartness of the blueberries.

Before a few months ago, I used my frozen blueberries exclusively for smoothies. Smoothies are hot right now, but smoothies are super cold--too cold for me. In these winter months a hot meal is what feels good, so this wojape is exactly what my body seems to want. I love to bring it with me, hot, in a wide-mouth thermos to enjoy it at school or when setting out on weekend travel.

Want to give my revamped wojape a try?

Blueberry Wojape

4 cups frozen blueberries (If you have fresh blueberries, don't be silly, just eat them fresh!)
2-4 tablespoons water
2-4 tablespoons freshly ground cinnamon
2-4 tablespoons maca powder (optional)

Combine the first three ingredients in a small pot over low heat, stirring occasionally. After the berries are completely thawed and the liquid boiled down a bit, remove from heat and stir in the maca powder. Makes 2 servings.


Picture
Blueberry Wojape with Cinnamon and Maca
0 Comments

Cinnamon, Rediscovered

4/17/2014

1 Comment

 
Picture
Behold, friends, an entire post dedicated to the magic that is cinnamon. See, me and cinnamon went way, way back. I thought I knew knew the herb--good ol' cinnamon, you know: tasty with apples, fun in a smoothie, a secret ingredient in a handful of savory dishes, even.

Then came the day I threw a few cinnamon sticks (also called quills) in my herb grinder.
That's when we really met, and I learned that cinnamon is less like a flavor of boxed cereal and much more like
a small fire that burns sweet, a gentle sun ray spiked with electricity, or a languid kitten that dreamily pricks you with its tiny claws. Oh, cinnamon.

This transformation of the herb from familiar to delightfully powerful and somewhat exotic, is the effect of experiencing the plant in a more complete way. Grinding the herb right before using it eliminates the time that the ground herb sits around, all the while dissipating it's precious constituents directly into the air, or allowing light to break down the herb's natural chemicals. So, maybe cinnamon can serve as an example of how alive these fresh ground spices can be.

A couple years ago, I bit the bullet and bought myself a coffee grinder and dedicated it solely to herbs and spices (no coffee allowed!). The payoff has been all these super sexy new relationships with herbs I used to think were mundane. Mustard seed! Cumin! Black pepper, for crying out loud! Who knew black pepper had floral notes??

Picture
Grinding herbs at home isn't too complicated as long as you have a spice grinder (or coffee grinder, same thing) that you're willing to keep free of coffee beans. Just throw in your spice and press the only button on the machine!

In the case of cinnamon, it's helpful to break up the quills into pieces. Sometimes wedging a table knife into the slits of the quills is the easiest way to break up a tough one.

If I'm being meticulous, I'll wash the grinder between each spice (to avoid contamination of herbs with each other). I've also heard of grinding rice between herbs as a way of "cleaning" the grinder. Do you have any good spice grinder tips?

Picture
1 Comment

Bacon, Feta and Butternut Squash Omlette Muffins

2/27/2014

1 Comment

 
PictureBacon, Feta and Butternut Squash Omlette Muffins
Ok, kids. I've caved. I've become one of those food bloggers who features bacon prominently and probably unnecessarily. It's a bit of a savvy blogging tactic, I think--a little pandering for clicks, perhaps. It's just that bacon is so sexy.

Really though, the meat of this recipe is the fact that it's super low carb, comes in a cozy little package and is very adaptable. As for the bacon, you can take it or leave it.


Variations on this recipe that I've tried include:
  • Roasted Roots with Spicy Italian Chicken Sausage
  • Winter Veggies with Sharp Cheddar and Pecorino Romano
Obviously, this can easily be adapted to fit your diet/lifestyle needs. I've included the pictured recipe, as well as a generic recipe below.

Big thanks to my colleague, Desta Golden, for supplying me with this brilliant low-carbohydrate idea via our Diabetes Management class. Watch out Virginia, Mrs. Golden is headed your way in a couple years!

Picture
Prepped, but unbaked Bacon, Feta and Butternut Squash Omlette Muffins
Serving Size: 2 muffins
Carbohydrates: 7g
Fiber: 1g

Bacon, Feta and Butternut Squash Omlette Muffins
(GF, low lactose, low GL)

3 bacon strips, uncooked, chopped
1 small onion
5 eggs, beaten
2 tablespoons plain whole milk yogurt
black pepper
nutmeg
3/4 cup butternut squash, cubed and roasted with salt
1/4 cup feta cheese, some reserved for topping (I used goat milk feta)
2 tablespoons pumpkin seeds

Preheat the oven to 350˚F. Fry the bacon and onions together until the bacon is fully cooked and the onions are clear or slightly browned. While they are cooking, combine the eggs, yogurt, black pepper and nutmeg and whisk together until completely incorporated. Fold in the squash and feta and set aside. Grease 6 muffin cups with butter or coconut oil, then spoon the cooked onions and bacon, pour the egg mixture over this until the liquid almost fills each muffin cup. Top with the reserved feta and the pumpkin seeds and pop this pretty mess into the oven. Bake until the tops are golden and the center is springy, about 20-30 minutes.


Omlette Muffins: Choose-Your-Own-Adventure Style (GF, possibly: vegetarian, low GL, lactose free)

5 eggs, beaten
2 tablespoons plain whole milk yogurt
black pepper
nutmeg
1 cup cooked veggies (pick your faves!)
1/4 cup cheese, some reserved for topping (completely optional)
2 tablespoons chopped nuts or seeds for garnish (optional, but why not?)

Preheat the oven to 350˚F. Combine the eggs, yogurt, black pepper and nutmeg and whisk together until completely incorporated. Fold in the veggies and/or cheese and set aside. Grease 6 muffin cups with butter or coconut oil, and fill them 7/8ths full with the egg mixture. Top with the reserved cheese, seeds or nuts and pop this pretty mess into the oven. Bake until the tops are golden and the center is springy, about 20-30 minutes.
Picture
Bacon, Feta and Butternut Squash Omlette Muffins, just begging to be eaten
1 Comment

Cozy Cocoa

2/11/2014

0 Comments

 
PictureHot cocoa overlooking a snowy backyard
The snowy dreamland that was Portland this past week prompted some delightfully cozy activities, like bundling up for long crunchy walks, mulling wine, napping all day, and of course, hot cocoa.

Ever since I started eating a little healthier a few years ago, hot chocolate repeatedly proved itself a disappointment. The coziness it could instill was never worth how weird and gross I felt afterward, so I was really ok with the idea of giving up hot cocoa forever. I figured I had outgrown it, the way I outgrew other childhood activities like watching other people play video games, or playing the impressively uninventive two-person card game called War.

Recently, though, my sister gave me a small package of stone ground mexican-style dark chocolate and told me how to make it into hot cocoa. I liked it, and aside from a boost in coziness, I felt totally normal afterward. But, I didn't realize just how good it was until a few days ago when I served it to a friend who "mmm"-ed over it and said, "Oh my god, I love you. This is so good." So maybe it's worth sharing, yes?

I'm not one for cooking from packages, in general, or certainly not showcasing it on the internet, but in this case, I think it makes some sense. A couple pieces of the Mexican-style stone ground chocolate, made by TAZA Chocolate, provides the cocoa and sugar in a refreshingly not-too-sweet ratio (while helping to keep us from over-adding sugar to the mix). Add this to boiling water in single serving cup with cream and it's as quick as a package of the 'Miss, but way tastier. I like to add cream instead of milk because it's easier on folks who are sensitive to lactose, like me and many of my guests.

The cocoa pictured below contains a dollop of cream that had just barely turned to butter in the carton. Yum!


Picture
Simple and real hot cocoa
Serving Size: 1 recipe
Carbohydrates: 4.5 g
Fiber: 0 g

Cozy Cocoa (GF, low GL)

1/3 oz Mexican-style dark chocolate (that's 2 chunks if you're using TAZA)
8-10 oz water (to be boiled) plus hot tap water
2 tablespoons cream, coconut milk or alternative milk
vanilla, chipotle, cinnamon, ginger, cayenne or nutmeg (optional)

Put a pot or kettle of water on to boil. In the meantime, fill a mug with hot tap water and set aside. Once the water is boiling, empty the mug, place the chocolate into it, and pour boiling water over the chocolate. Stir with a warmed spoon until the chocolate has completely melted. Add the cream/milk and any other spices you'd like and enjoy!
0 Comments

    Author

    Lorraine Ferron is a medical student, writer, and food lover. Read more about her at SweetAllium's About page.

    Archives

    August 2014
    May 2014
    April 2014
    February 2014
    November 2013
    October 2013
    July 2013
    June 2013
    May 2013
    April 2013
    March 2013
    February 2013
    January 2013

    2011-2012

    Categories

    All
    Classical Chinese Medicine
    Gluten Free
    Herbal Preparations
    Herbal Preparations
    Lactose Free
    Low GL
    Low Glycemic Load
    Medicinal Herbs
    Med School
    Naturopathic Medicine
    Recipes
    Vegan

    RSS Feed

    Blogroll

    thelocalspoon
    101 cookbooks
    Licking the Plate
    wild heart medicine
    Maximum Wellness
    BeKindTellTheTruthEatGoodFood
    Our Global Kitchen
    HellaDelicious
    Nectar
    Not Without Salt
    Civil Eats
    Edible Portland
    Smitten Kitchen

Powered by Create your own unique website with customizable templates.